|
Our awesome architects at Precipitate are far enough along with construction details that they could create a couple of visualizations of the second floor! These are drafts for us to react to, and they're super fun. Take a 360 degree look here and here!
In these views you'll see our kitchen, the location of the dining area (which will be an Austrian style nook), the living room, and staircase to the first floor. If you pan up, you'll see "Peter's Perch" loft area, which will be accessed via a sliding ladder (a la Belle borrowing books in Beauty in the Beast ). 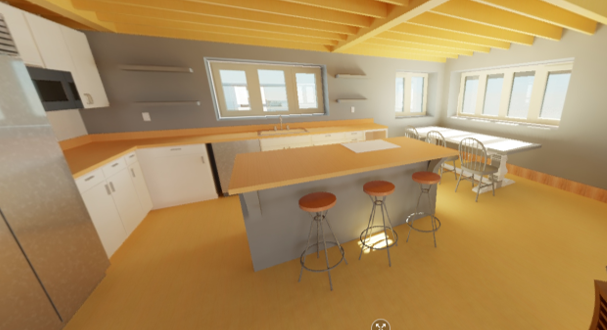
Still capture of one of the 360 deg visualizations.
0 Comments
Peter here! In addition to the complexity of the build itself, we had some site constraints and challenges that we have had to deal with in advance. Given that we are building this new house behind a triplex, the site is quite tight. The overall site is just under 6,000 square feet (~⅛ acre). Where our new house will be built, we originally had a garage with a small, beach themed hang out area next to it (from the previous owners - don’t blame us!). This area also included a very nice, miniature magnolia tree and a (volunteer but thriving) white pine. On the back property line, we have a few Ash trees and a series of power lines, including a utility pole in the NE corner. In most parts of Minneapolis, these lines would be running in an alleyway, but our block happens to be a rare one without an alley, meaning that utility easements run directly through properties. In addition to electric (Xcel Energy), those poles are also used to string telecommunication lines (Comcast and CenturyLink for us).
In order to prepare our site for this build, I have spent quite a bit of time both working to clear the trees among the power lines, save the trees that we can, deconstruct the garage (deconstruct instead of demolish - reuse some of the materials!), and bury the power lines to gain us more space at the back of the property. The last part has been the most challenging. Our neighborhood is filled with a lot of housing types, from single family to large apartment buildings. We also mix in a lot of commercial properties. The electric needs are quite varied and our utility poles are crowded with wires to meet all the various needs. This creates a challenge because there are constraints on how much infrastructure can go on any given pole. We are unlucky in that the poles directly to the north and south both have transformers on them. With the number of lines that we also have running to our triplex (particularly because we also have solar and high gauge wiring for heat pumps), our poles are already close to capacity. To make everything work for this site, we are actually going to have to add a second pole. We will now have a pole in the far NE and SE corners, with underground lines running in between. This is a bit gaudy and annoying, but at the same time, we want to bury the electric lines because we are trying to gain every possible, usable square foot on a very tight property. By burying the electric lines, it gains us at least 2-3 feet on the back property line, which will make our central yard feel larger and give us greater separation from our triplex. Though it may seem minor, this makes a big deal for the feel of our site. Strangely enough, in order to bury our electric lines, our utility (Xcel Energy) is having us dig our own trench and provide conduit and meter upgrades. I find it quite odd that the utility would want us to do this work for them. It is also a pain in the butt because nobody wants to dig a trench for us on a tight lot. Luckily, we managed to find an awesome tree company (Daniel Thompson Tree Services) willing to do all of our tree work AND the trenching for us. Daniel has been amazing and was in the trees for 3.5 straight hours, casually dropping trees in a narrow window around power lines. He saved our beautiful magnolia tree and it is thriving in its new location. I highly recommend his work. On the electrical side, we needed a slip sleeve installed to move from an overhead connection to underground. Again, a pain in the butt, but my cousin is an electrician and handling that work for us through his company. I’m not sure there are many lessons learned here, but I wanted to lay out the extra work needed in addition to the actual construction for this project. I coordinated all of these projects (set the scope, solicited bids, negotiated, and coordinated timelines), so these are all costs that haven’t necessarily been captured in our budgeting discussion (see previous blogs posts). These projects are complex, particularly on such a tight site. Hopefully it works out for us! As always, let us know if you have any questions about the work we have done and we are happy to share resources. Honestly, this and financing are what give me the biggest heartburn at night. Damn is budgeting hard. Peter here!
Designing new products or being an early adopter of new products is expensive. Particularly if the products are bucking long-standing trends, they can both be a financial headache and a regulatory one. As an easy example, our thicker straw bale walls necessitated us asking for setback variances (to avoid shrinking our living space) and a lot of extra hurdles to ensure the building officials were comfortable with the safety of straw bale construction. Being on an urban lot also means that our project has more regulation (higher permit fees), stricter work standards, and tighter lots. The last part has a tendency to naturally drive up prices because it is inconvenient to even get to where we want to build. Minnesota additionally has strict rules on electricians that also drives up prices. Lump all of these pieces into wanting natural materials, often only found with speciality vendors or from abroad, and the price tag can explode in a hurry. There is no way to hide the fact that this is an expensive project. We are building our dream house that we plan on being in for however many years we are lucky enough to be around for. Balancing that long-term nature with the nearer-term concern of needing to pay for this project has been a challenge. We also quite frankly didn’t realize how much permits, architects, site prep work (tree clearing, Xcel line burial, etc.) and design consulting was going to cost. When it is all said and done, the full cost of this house will be almost as much as we spent to purchase the triplex on the front of the lot. That has been a brutal realization for me. We started with a budget of $300,000 for this project. Once we had picked out the materials that we wanted to use (eco-conscious, avoiding fossil fuel products as much as possible, lots of European elements, etc.), it quickly became clear that we wouldn’t even be close to this. We paused the project for a year to figure out what a more realistic budget would be, what compromises we were willing to make (if any), and if we could make all the money line up (financing post upcoming). In the end, we decided to build the house with very few compromises on materials. There are some that we can’t get around for building code reasons (drywall underneath the roof for fire code or the 6 mm polyethylene layer that we had to put underneath our foundation for radon protection), but we decided to follow a German phrase: wenn schon, denn schon. This translates roughly to “if you’re going to do it, do it fully.” As embarrassing as it will be if we have to delay this project by another year to pay for this, we are building a long-term home and want to do it right. This clearly shows a level of privilege on our part and we acknowledge that and know that it won’t be the case for most folks, but we wanted to at least be open about our thought process in our blog. If you can’t be honest in a lower readership blog, where can you be honest? Will this decision stop me from having period panic attacks about where the money will come from? Absolutely not! Once financing closes, though, I will certainly breathe easier. More to come on that front! Peter here, making his blog debut! As the handful of thorough readers may have gleaned by now, both Katie and I have a very particular set of design and material needs with this project. We are hoping to mix the Passivhaus energy concepts with the straw bale elements that Katie has become enamored with from her experience in Washington state with Andrew Morrison and his workshops (see other posts on that topic).
You may be asking yourself, “Peter, why would you ever make your blog debut on a topic where Katie is clearly the more knowledgeable between the two of you?” Great question. I’m still looking for the answer. We have a lot of topics to cover and the COVID-19 stay at home orders give me a lot of time to help fill the word count (for future readers: remember this is 2020 and we have been at home for almost a month now while we work as a society to build a roadmap of how to as responsibly as possible reopen our economy during a pandemic for which we don’t yet have a vaccine). I also work in renewable energy and am at least somewhat familiar with/have been paying attention to our design plans. Plus, I just lean on my wife to fill in my knowledge gaps and keep typing along. Back on topic, though, an example of the challenges of blending passive house and straw bale construction came up this week that may be of interest to you, dear reader. The topic was window placement. Not where they go on the wall (though that has also been discussed to ensure proper daylighting and structural stability and may come up in a different post), but rather where they go in the wall. One of the challenges (and great opportunities!) with straw bale construction is that the walls are ~21-22” thick. If you put the window on the inside of the wall, you have the widest in-swing range for your windows. You are left with a challenge, though, of keeping water from pooling on the sills and at some point seeping into the bales below (would be a HUGE problem). If we wanted to take this approach, we would need to have full metal sill wraps, with an additional waterproof layer on the bottom sill to make sure that the metal didn’t have any condensation problems that still could lead to water seeping in. The waterproofing layer almost assuredly wouldn’t meet Katie and my requirements for eco-friendly materials. On the other hand, if we put the windows on the exterior edge of the walls, the windows can’t open as far, but we get the cool aesthetic elements of window seats or shelving. We have the struggle, though, of structural stability. Attaching the windows directly to the bales would be incredibly challenging and not structurally sound. We need to build a box beam to support the window. The downside here is that the traditional box beam construction uses plywood, a material that isn’t on our desirable list either because of the glues used in its creation. There are some middle options, but they ultimately just end up taking the negative elements of both of the above options without providing any real benefits, so we will leave them out for now. What should we do? We had to make a compromise either way. Ultimately, we ended up moving the walls to the exterior wall. I personally like the window seat/shelf component and it gives us much more security that we won’t have any moisture issues with the straw bales, which is priority #1 for us as people that want to live healthily in this house. The windows won’t open as far, but we have also found that with tilt-turn windows, we more often tilt the window anyway, so neither of us are as concerned. I imagine Katie will tell me to cut out some of the narrative elements above to get to the point sooner (which I’m sure many of you will thank her for), but I appreciate you all humoring me in my debut! Getting building official approval of strawbale construction in Minneapolis is tricky due to a failed strawbale build over a decade ago (this build is legend, but no one can actually point to who the builder was or where it was located other than somewhere in South Minneapolis). Knowing this, our design team is arming themselves with all of the facts about strawbale construction that will hopefully convince building officials to approve our build. Luckily, the International Construction Code (ICC) now has a strawbale chapter (Appendix S Section 105.6). Although MN has not officially adopted this chapter, it nonetheless gives us a strong argument that this alternative construction style has been vetted by experts in the construction industry. We anticipate one of the building officials' biggest concerns is going to be moisture, and the ICC strawbale chapter does a lot to address that. Of particular concern initially for our design team was the call out of stricter perm ratings (meaning - increase vapor retardation) with class II vapor barriers needed for the bale walls in climate zones 5-8 to avoid potential moisture issues in the bales. Being in zone 6, we're included in that. The design team was contemplating the need for an additional sealer on the interior plaster to stop vapor flow. Luckily, Andrew, our strawbale expert, was able to provide evidence that our lime based plaster will more than sufficient at minimizing vapor permeability with perm ratings less than 1 making it qualify as a class II vapor barrier (source of lime plaster: https://limes.us/resources/research-papers/ and table here: http://www.stastier.co.uk/nhl/testres/test24m.htm). So yes, lime-based plaster is a sufficient vapor retarder for strawbale building in Minneapolis, MN. Below is the vapor retarder section of Appendix S of the ICC code, which covers strawbale construction. 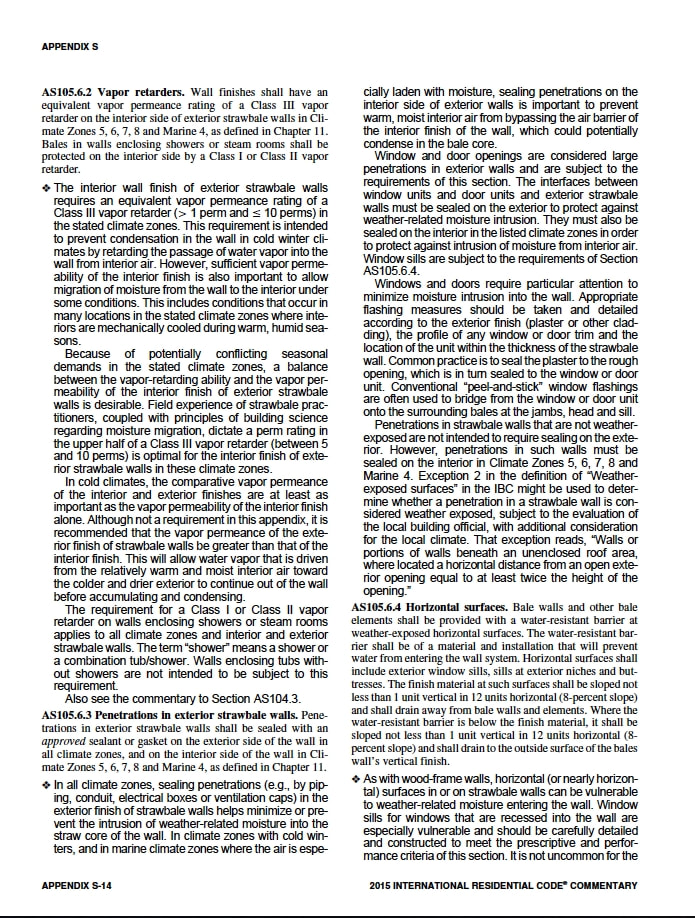 The biggest enemy of buildings is moisture, and that's even more so with strawbale buildings. So it's very important that we get key details, like window and door openings, right. Let's start with the goals of our walls: - Being in a cold climate (climate zone 6a), we need to maximize the insulation value of the strawbales. - The post and beam structure needs to support the building. - Indoor and outdoor plaster layers retard moisture and suppress fire risk. - Windows and doors bring light, ventilation, and access. - All materials are as natural (not fossil fuel-based) as possible. To accomplish these goals has required a bit of design gymnastics, with the outcome being the following: - post and beam structure will be on the INSIDE of the structure. Wood has a lower R value (insulative value of ~1/inch) than strawbales (R value up to 2.38/inch), and thus wood on the outside would serve as a thermal bridge. By continuing the straw continuously around the envelope, we're maximizing heat retention. - windows need to be located toward the outside of the wall. This reduces horizontal surfaces and thus the risk of moisture intrusion. - With the post and beam structure on the inside and the windows toward the outside of the wall, we needed to find a way to support the windows. The outcome is a box-beam header that bridges the 1.5' gap cross the wall between the window and post/beam. The one bummer with this solution is that it requires plywood, a material that includes synthetic glues. However, this was the best option give the structural and moisture deflection needs. Example below of how a box beam is built. Basic 2x4 consturction that will be filled with insulation and topped/bottomed with plywood. 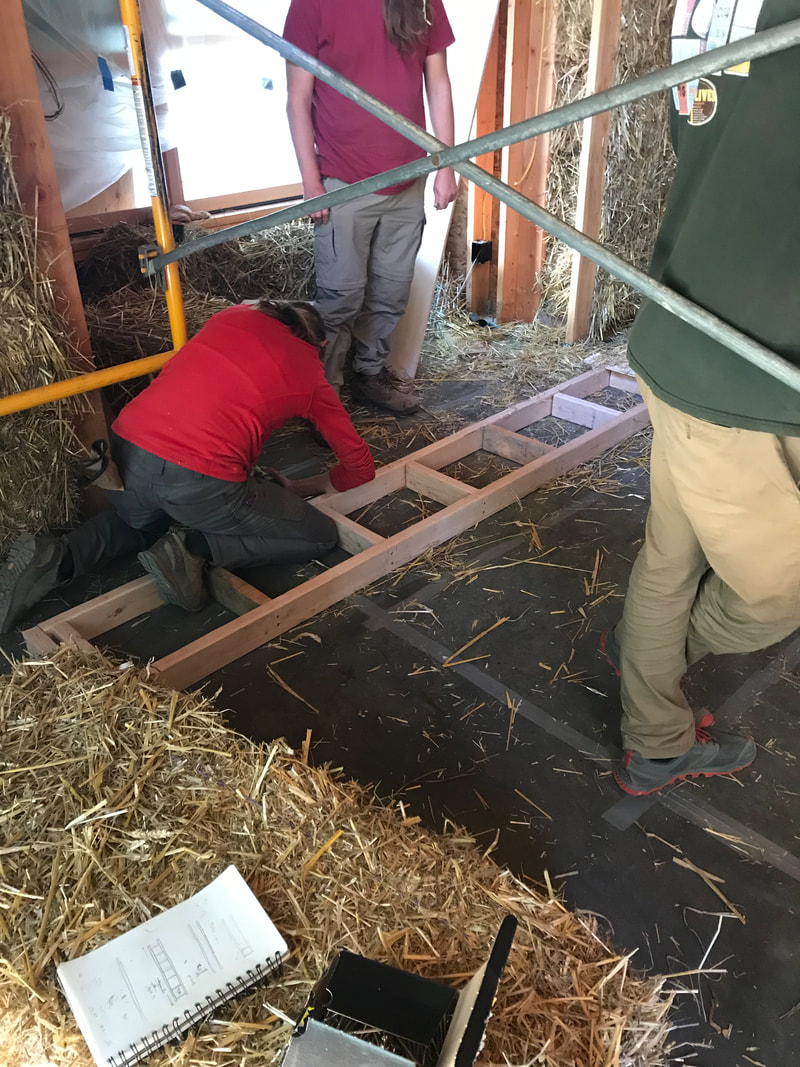 |
AuthorKatie Jones and Peter Schmitt chronicle their building adventure. Archives
January 2024
Categories |
 RSS Feed
